Procreate for Kids - 5 Age Appropriate Digital Art Activities
Procreate for Kids
5 Age Appropriate Digital Art Activities
This post may contain affiliate links. If you use these links to buy something I may earn a commission at no additional cost to you. Thanks.
Do you have a creative young child and you’re wondering what you can do to help them develop their skills?
Have you ever considered digital art? Getting your kids started with digital art is a great way to give them early exposure to a skill that will be beneficial to their creativity in their future.
In this blog, we will look at the digital art software Procreate, and I will share a list of age-appropriate activities for little ones as young as 4+. You can start using these ideas now while they are learning how to navigate the technology, as well as their art and motor-skills.
The digital art world is expansive and there is much to learn, but in this tutorial I will be focusing on ways your little ones can use the Procreate app. As a mother and an art teacher, I have seen many children use it with great success. I will share with you a few of the activities developed with my own four year old daughter, as well as some I’ve developed based on my experience teaching various age groups.
What is Procreate? It is a real-deal creative app created for real artists.
Some people might tell you that Procreate is too advanced for kids, especially young kids. They would be right— if you’re expecting your child to master the software and use it to its maximum potential. Consider that most adults only have a partial grasp of the potential of the Procreate app, even those of us who use it nearly every day. So while true, it shouldn’t be the deciding factor. You could opt for something “made for kids”, or you can expose your little one to the real-deal creative software that is made for artists— with the understanding that just like any medium you give them (crayons included), mastery of the medium is not required for it to be worthwhile. With the right supervision and guidance, what they can do on paper, they can do digitally. It is boundless creativity and a great way to practice the motor-skills they are developing at each stage. In fact, the extra hand-eye coordination practice is what I love most about using Procreate with the 4+ age group. And, you can let them practice page after page (after page) with a smaller environmental impact (so much less paper waste).
In this tutorial, I will give you an overview of the coolest uses and activities I have found for kids using Procreate (listed by age.)
Quick Links
The tool List
First of all, you’ll need the tools. Below you can find a list of all of the tools you’ll need to be able to get started in digital art. You don’t need that much to get started. You may even have an iPad that you allow your kids to use already. If that is the case then you’ll need a digital pencil (or stylus) and the Procreate app. You can even manage without the digital pencil if you really want to keep it simple.
Apple Pencil- I use an Apple Pencil for my digital art. When looking for an Apple Pencil, you can find a 1st Generation and a 2nd Generation version, and just like any gear you could find a refurbished version for less money. You will want to do some research about which pencil is compatible with your iPad.
Procreate App- There are other digital art softwares out there, but Procreate has taken the digital art world by storm. It is user-friendly, CHEAP, ever-expanding and unbelievably diverse. Find the Procreate software in the app store for $9.99.
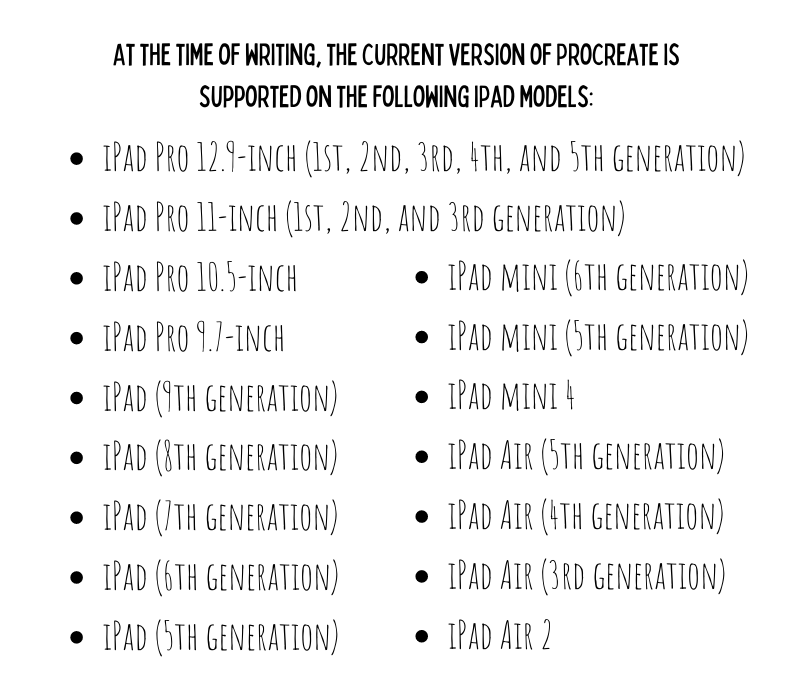
Ipad - Find an iPad that suits your budget. Below I have listed the compatible versions of the iPad from the Procreate website. Check the list below and do your own research to make sure you’re getting something that will be able to run the Procreate software.
Extras- All you really need to get started are the three things above, but if you get excited, there are tons of Apple pencil or iPad accessories that will offer some protection from the wear and tear of little hands. (All of these are clickable.)
Cute cat pencil cover
All kinds of cute covers (pay attention to which pencils they fit)
*As an Amazon Associate I earn from qualifying purchases.
Ages 4+
Quick Snap Function - Scavenger Shapes
Drawing Assist Tool - Mandalas
Color Fill - Color Fill vs. Color Skill
I bet it will shock some to know that I think Procreate is awesome for kids as little as 4 years old. As an artist-mom, my daughter sees me draw on my iPad all the time. I use the drawing app both for my own art and teaching art lessons to kids online. When she begged me to let her take a turn using my digital pencil on Procreate, I decided to give it a try to test my theory that there was value in early exposure to that skill, and that she would pick it up alarmingly quickly. Of course she did, and absolutely adores it. But it’s not just fun. It has also been a very worthwhile learning experience for her.
Don’t be fooled by the advanced technology. Your littlest little ones are developing all of the motor skills used for writing and drawing, so just because they won’t be mastering the technology or even the art skills right away, does not mean there isn’t value to introducing them to the digital medium. This creative software is a new art medium just like any crayon, pencil or paint they try for the first time (and frankly it is probably their future.) In the same way that no one expects a child to master their painting skills at four just because someone put some tempura paint in their hands, you can set the expectation of output that is in line with their developmental stage. You don’t have to think about the value in terms of their knowledge or skill deficit, but rather as the introduction to another new creative experience that they will build on as they grow.
1. “Quick Snap” Perfect Shapes
Procreate has a function called “Quick Snap” that corrects the wobbles in your drawn shapes, such as circles and straight lines. It’s very simple and you won’t have to play with it long to get a sense of how it works. You can think of this a little like a digital ruler tool.
Basically, when you draw a circle rather than picking your pencil up when you have reached the beginning, hold it down and watch as the shape “snaps” to a clean version of the shape you’ve just drawn.
Same idea with drawing lines. Draw a line and hold your pencil down to see it snap into a straight line. Keep holding and move the pencil (or your finger) around to change the angle and length of the line. If you decide you do not want the perfected version of the shape you’ve drawn, just hit “undo” and it will return to the organic, hand-drawn original.
Let your young child try this out and watch their little face light up when their wobbly little lines snap into smooth shapes. I think the ability to create something that seems allusive to a small child makes them feel very powerful and gives them confidence, which is exactly what art should do at this age.
Unless your child never draws on paper again, I wouldn’t worry too much about it hampering their analog drawing skills. To keep things in balance, I will challenge students to try to see how well they can draw a circle or line without using the quick snap function and make comparisons to the corrected one. As my daughter plays and proudly shows me things she has created I will encourage her with something that sounds like, “Who made that amazing line? Whoah. I bet if you keep practicing your drawing skills you’ll be able to do that WITHOUT any help.”
Activity: Scavenger shapes
This activity is really simple. Use the list below, or make up a a list of your own to create a “Scavenger Shapes” game. Basically, it is a scavenger hunt but rather than finding the objects, they are creating them. Give them the list of shapes created by either a straight line or circle with the quick snap tool and let them recreate each one. I like to use the monoline brush in calligraphy, but you choose a brush you like.
Scavenger Shapes Ideas
Perfect Circle
Skinny Rectangle
Oval inside of an oval
Diamond
Triangle inside of a circle
2. Drawing Assist Tool
Another awe-inspiring tool for children is Drawing Assist, another sort of invisible ruler. This tool is exactly what it sounds like — it assists your drawing. There are multiple ways this can be used, but today I am going to focus on a few of the “symmetry” guides. The symmetry setting in drawing assist duplicates every mark on one side of the canvas exactly the same on the other side of the line, making a perfectly symmetrical drawing.
How to: Starting with Actions menu (the little wrench) click the Canvas icon. Below you will see an on/off toggle for “Drawing Guide”. Turn the guide on and then click “Edit Drawing Guide”.
The drawing guide will open up to a grid that you can adjust, but, to create symmetrical drawings, find “Symmetry” in the lower right corner. Below it find “options”. Clicking options will prompt you with four options: vertical, horizontal, quadrant, and radial. These options are somewhat self-explanatory, and you can play around with them to discover what all can be done, but I find that vertical and radial are the most fun for kids.
Vertical
Use vertical drawing guide to create drawings that are symmetrical on the left and right sides. This can be exciting for drawing things like butterflies, flowers, hearts, or anything that you want to be mirrored on each side of the page.
Radial
The radial drawing guide is where things really get exciting. This drawing guide splits the canvas into 8 even sections, radiating from a center point. Anything you draw in one of the sections will appear in all of the remaining sections. This is perfect for flowers, mandalas, and some generally trippy, cool drawing fun.
*Parent-Hack: For your younger children, you will probably have to set up the canvas to use this feature. Rather than going through this process over and over one thousand times (and they will want to do it that many times), do this instead: When setting up the canvas, after creating an assisted drawing layer duplicate it a few times. Then each time they are finished and want to do it again, simply uncheck the layer to hide it and tap the clean blank layer below. Troubleshooting: If you add a new layer rather than duplicating the original layer it will appear with the same guide lines but it will not mirror the marks. If you find that the marks are not being mirrored but the guide lines are still visible, simply tap the layer and making sure there is a check by “Drawing Assist”.
Activity: Mandalas
To set this activity up for your child, create a new canvas and turn on the Radial Drawing Assist. (See the instructions above.) Choose the monoline brush or a brush that does not have a texture. You don’t need to grasp the technical reason for using a brush without texture, but it has to do with the way the brush is created, and some can have even single pixel sized gaps in what appears to be a solid line. Remember that if they would like to add color using the color fill after they have drawn their mandala, you will want a brush that does not have gaps in its texture.
Once the radial drawing assist is turned on, they are basically ready to start creating their mandala masterpiece. You can prompt them with directives like, Try using only curvy lines, etc. Or you can let them do their thing. Read Color Fill below to learn a fun way to add color after they draw their designs.
Parent hack*: Save yourself the interruptions every few minutes (seconds) when your child is finished with drawing and would like to do another. When you begin your canvas and you have a layer set up with guides, duplicate the blank layer as many times as necessary. Set your child up drawing on the top layer. When they are done with that drawing, simply uncheck the layer to make no longer visible and then tap the next open layer and let them go for it. Once you have it set up, your child can probably learn the process quickly and will only need you for troubleshooting. Troubleshooting: If a dialogue box pops up about hidden layers, it probably means you’re still trying to draw on a previous layer that you have hidden. Always make sure that you are drawing on the visible layer, or that the box to the right of the layer is checked for the clean layer where you are drawing.
3. Color Fill
The drawing assist feature you just learned is the perfect precursor to the Color Fill function because after drawing those amazing symmetrical drawings, children can fill them with color. It is a fairly straightforward process. Anytime you draw a closed shape in Procreate (more about that momentarily) you are able to drag your selected color from your color options and “fill” the space. This would be the alternative to manually coloring inside of the lines to fill the space as in our coloring books.
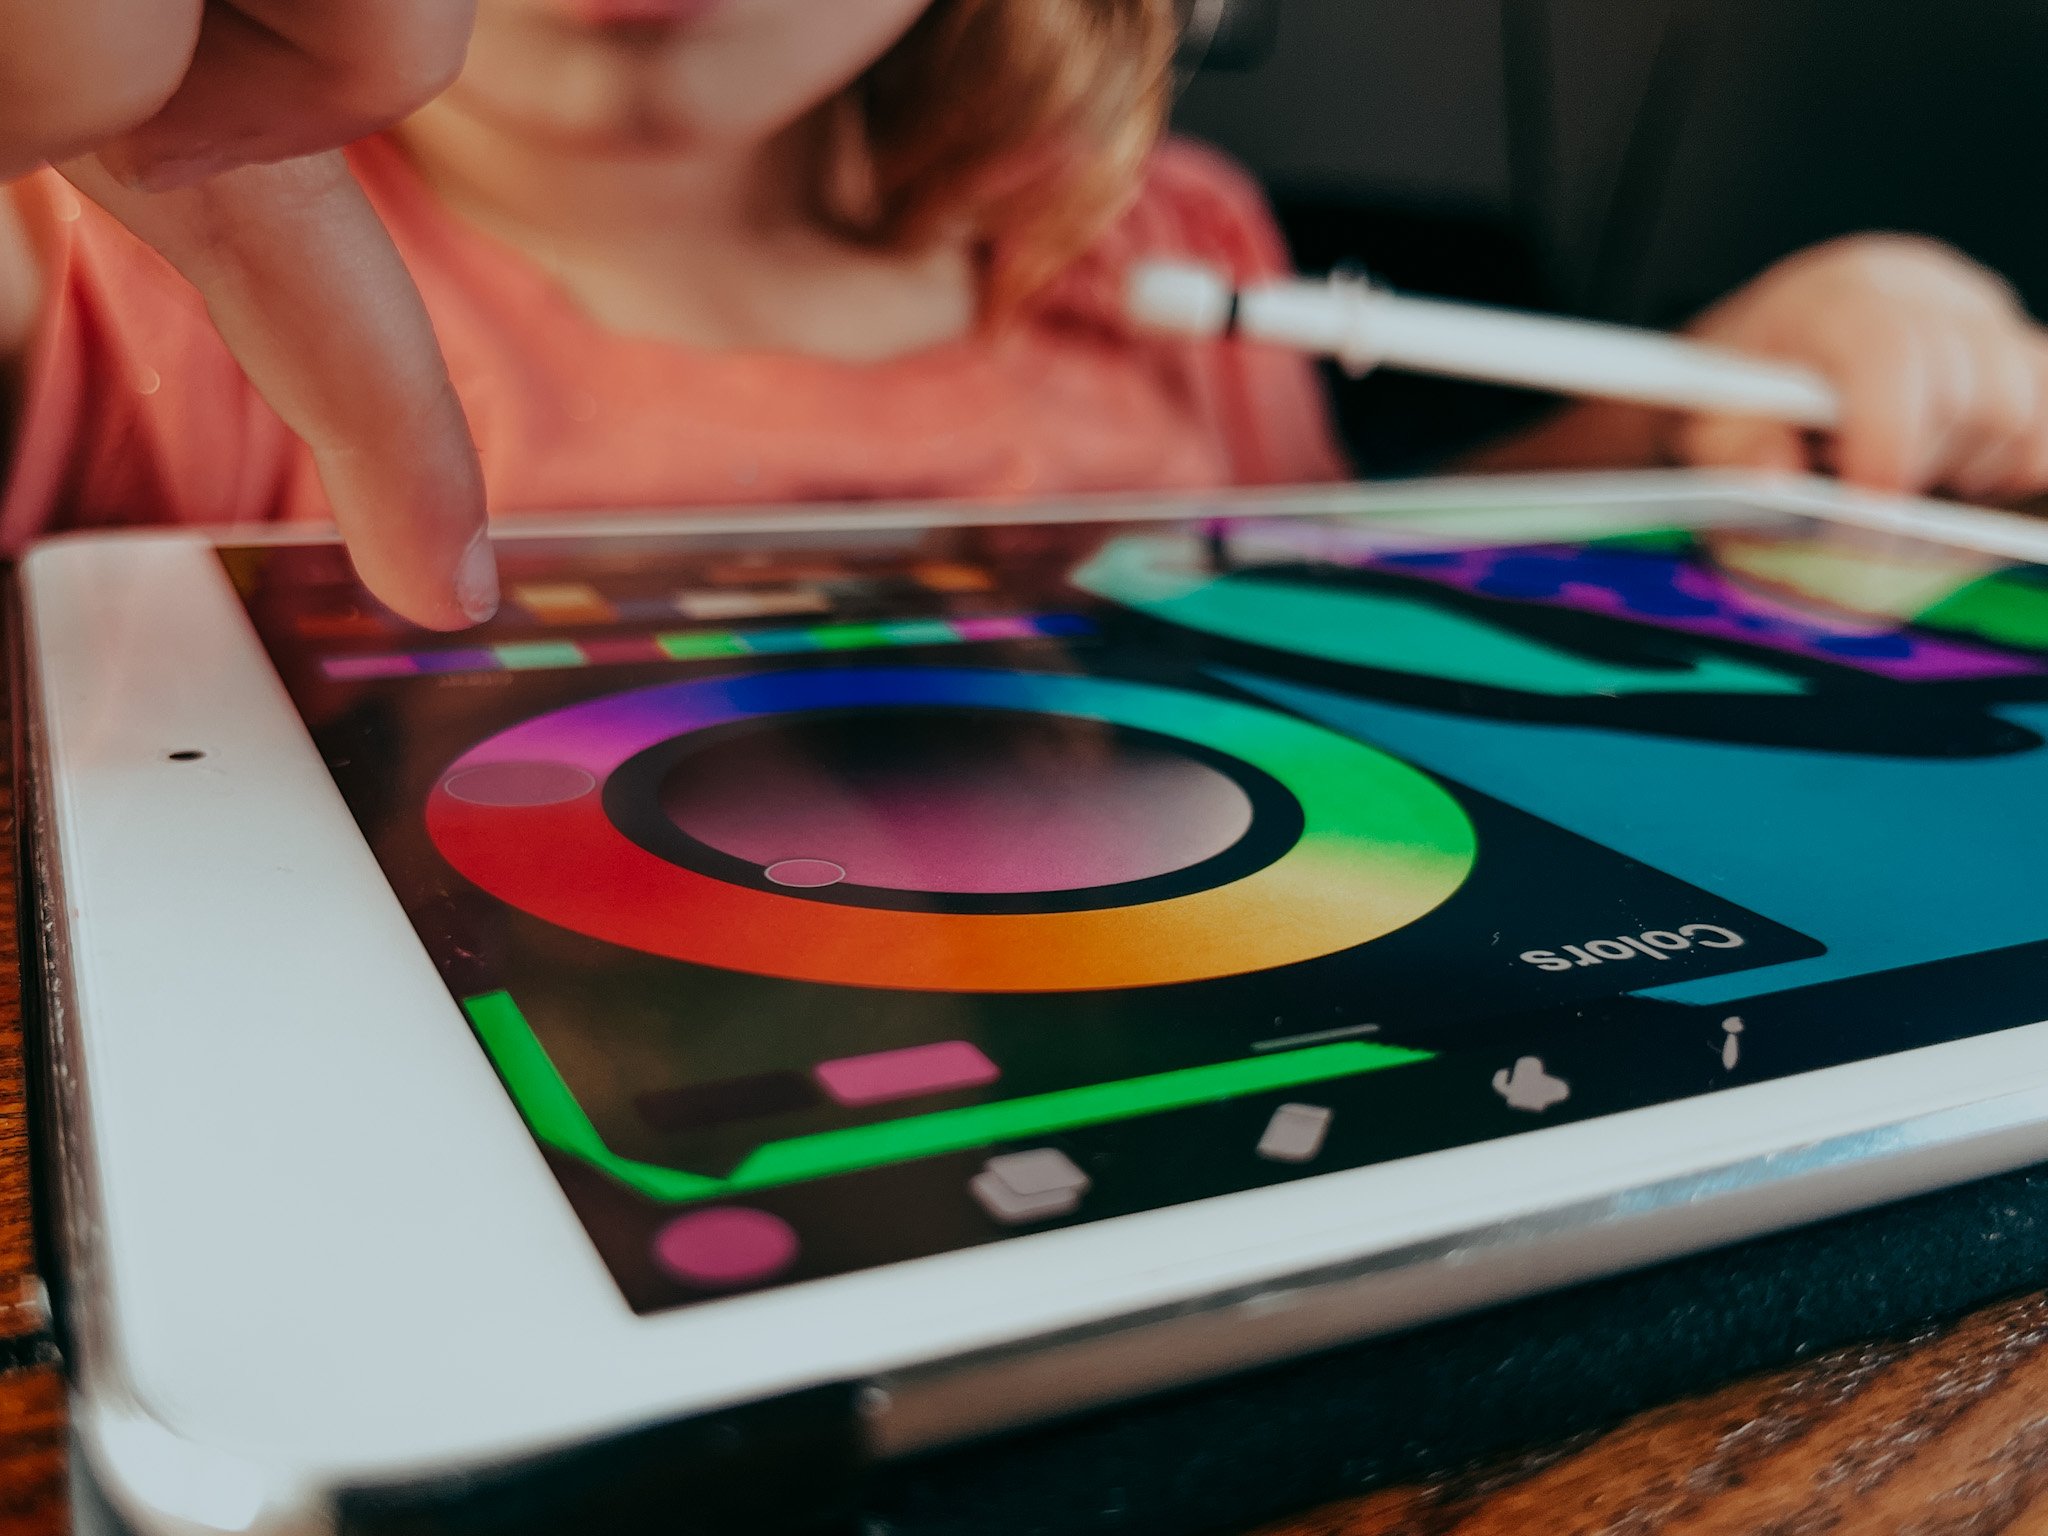
How to: In the upper right hand corner there is a colorful circle. This is where you find all of the many color options for selecting the color of your brush. Tap the circle to open and you will see two concentric circles with draggable dots inside. The outer circle is the color wheel that allows you to choose which color family you would like. Drag the dot in the inner circle to choose the saturation, brightness and intensity of your color. Play with this for a few minutes and you will probably have a good understanding.
Choose a color then tap the colorful circle in the right hand corner again to collapse the color menu. Now you can see your selected color in the circle. Touch and hold that circle and drag it into the space you would like to color. If you are filling an empty canvas it will fill the entire space. If you have a shape drawn, you can drag it and release once you see it fill the shape or space you are trying to fill.
Troubleshooting: If you drag your color and it fills the entire canvas instead of the shape you are trying to fill, it is probably because the shape has a gap somewhere where it meets another line. The color fill will “leak” out of any open spaces, even down to the smallest pixel. Try drawing over the point where your lines meet to make sure there are no gaps, or choose a brush that does not have an open texture and try again. At times you will also accidentally change the color of your outline. If you don’t want this, remember that you can hit the backward arrow and undo, and zoom in to make it easier to hold your finger in the space you are intending to fill.
Activity: Color fill vs. Color skill
Set this activity up by creating a layer with the vertical drawing assist guide on. First, ask them to draw a set of shapes on one side (which will be copied onto the other side of the canvas.) Then turn the drawing assist off by tapping the layer and unchecking next to Drawing Assist. Alternatively, you can ask them to draw two sets of shapes on each side and draw a line down the middle.
Then select a brush that mimics a crayon or paint brush for side they will color manually. I recommend oil pastel in “Sketching” or wet acrylic in “Painting” because they are interesting and mimic materials they could use, but you can find any one you like.
Next ask them to “fill” in the shapes on the left side and “color” in the shapes on the right. You can either leave them to discover on their own, or prompt them to think about the differences in what they are doing by asking questions like,
Which way of coloring is faster?
Which one looks more like paint (or crayon, etc.)?
Pre-drawn coloring pages
As I already mentioned, children can fill the intricate mandala designs they have created. It is a lot of fun to drag and drop color into all of the crazy shapes and designs.
Another option to adding color to their own artwork is to add a pre-drawn coloring page to their canvas and let them “color” using their new color fill skill.
Since part of the aim at this age is to help them learn their way around the technology and to tune the specific motor-skills necessary in the digital world where they will inevitably exist, not every activity has to be geared toward art skills.
Yes, it is technology so we know they will get sucked in, but it is technology with a purpose. There ARE skills being learned from this activity, not the least of these being the time they spend selecting and arranging colors on the color wheel will help develop their understanding of color and help them develop an intuition about using color in art.
I find it so interesting to watch the laser-focus of my four-year old as she thoughtfully (and skillfully) selects her color from the color menu and then drags each one to fill the carefully chosen space. This is a GREAT activity when you need them to be otherwise engaged for a long period of time… and it is mostly* self-sufficient.
Ages 6+
Working with Layers- Layer Monsters
Brushes- Brush Scavenger Hunt
The chances are that by six, kids have had enough exposure and experience with technology that they are becoming adept at finding their way around new tech. Keeping that in mind, the possibilities for this age group are fairly expansive. Today, let’s focus on the synergy between the developmental stage of this age group and the slightly more complex uses of Procreate to find a few fun ideas that are both creative and educational.
Working with Layers
Layers in digital art allow work easy work flow. Imagine your layers as transparent pieces of paper stacked on top of one another. You add work behind a previous layer, rearrange layers, add layers and even turn their visibility off. This allows for a lot of creative control.
What are the main uses of layers in Procreate?
Creative control- Working in layers gives you a creative control that would be impossible in traditional mediums. As one example, when working on paper you are not able to decide whether to put the next layer above or below the previous. In digital art, you can.
Preserve work as you go- Digital art allows for a lot of fixable error. Obviously you can undo almost anything, but one of the ways that we preserve our work is by working in layers. Thanks to the ability to add and duplicate the layers at any stage, you have the ability to save your work as you go. Do this by using new layers as you work, and by duplicating layers of artwork at critical stages in case you need to go back.
Rearranging and playing- Layers allow for trial and error. Rearranging the layers will change the effect and appearance of each layer and you are able to test the best arrangement. Layers can be deleted and turned off, so it also allows for trying out different versions of your art until you are satisfied.
Creating multiple versions- Similar to the last note, you can create many versions of the same artwork without having to start from scratch.
Activity: Layer Monsters
To goal of this activity is to help familiarize your child with the concept of layers and get used to adding, rearranging and preserving layers. The end result will hopefully be some silly looking monsters. Lead your child through the instructions below once and I am confident they will be ready to do it on their own quickly.
Step by Step Layer Monsters:
Add a new layer and move it below the shapes layer.
On this layer, ask them to choose different colors and brushes to color each shape. Since they are on a new layer, they won’t be able to color fill (read about color fill above) and they will have to manually color with the pencil, but they will find that, unlike working on paper, their marks do not cover the lines of their shapes. Fun tip: by picking a textured brush and going outside of the lines of the shapes, they can create a “furry” or textured monster. Encourage them to be creative and do each one differently.
Begin a new layer on top of all of the layers. Selecting the brush previously used for the shapes, draw two circles for eyes on each monster. Inside of those eyes add a smaller circle. On this layer, have them use color fill to fill the larger circle white and the smaller circle either black, or the color of their choice. Fun tip: after this they can add a white dot in each of the smaller circles to make the eyes look like they have a reflection. Do this on a new layer on top if you feel up to the challenge.
On the same layer add silly arms and legs.
On the same layer as the eye circles, draw a mouth. Guide them to make sure the shapes are all closed shapes so that they will be able to use the color fill function in each shape. Add triangle teeth for a scary monster, or rectangle teeth for a silly monster. As long as each of these shapes is fully closed with no gaps, they can then color fill the teeth and the inside of the mouth (if they have one.)
Lastly, add a new layer, but this time drag it all the way to the bottom underneath all of your drawing. In this layer they can play by adding a background. They can fill it will a color and then draw on top of the color, or they can simply add grass. What they will find is that because this layer is behind their monster drawings, even if they run their pencil straight over the drawings, it will only show up in the background. COOL.
Repeat and change as they get comfortable. You can use this as a chance to prompt them with things like “Draw a furry, orange monster that looks silly.” or “Draw a tall green and blue monster with sharp teeth.”, etc. Prompting challenges them to explore the app more intentionally because they are looking for something specific rather than selecting something they happen to find. Intentional exploration will speed up the retention of what they have done.
2. Working with Brushes
Brushes are the tools for creating the real-life textures in digital artwork. In digital art, brushes are not just used for the painted textures. Brushes is the term used for the tool used to make marks on the page. Brushes can mimic the textures and strokes made from real artist material, or perfectly replicate complicated textures like hair, concrete or water.
What kinds of brushes can you use in Procreate?
Sketching- These brushes mimic graphite pencils, technical pencils, pastels and artist crayons.
Drawing-This set of brushes offers a mix of wet and dry mediums.
Inking - Include a variety of ink-and-brush styles, technical pens, markers, gel pens, and dry ink effects.
Painting - This selection of brushes covers mediums from acrylic to stucco to oil. They offer a range of brush behaviors including the drag of an aged brush and the smear of an oil brush loaded with turpentine.
Artistic - Texture effects from watery to clumpy. They build up or strip away color to reveal an underlying texture of paper or canvas.
Calligraphy - Create smooth and even calligraphic forms
Airbrushing - Lay down pure color and smooth gradients fast.
Textures - A unique set of realistic textures that mimic a wide range of surfaces and patterns.
Abstract - Brushes that change color, create smoky effects and generate chaotic shapes.
Charcoals - Realistic charcoal brushes is ideal for studies, portraits, and life drawing.
Elements - Smoke, flames, water, clouds, and more.
Spraypaints - A variety of spatter and spray effects.
Materials
Vintage
Luminance
Industrial - concrete, metal, stone, and rust effects.
Organic
Water
Activity: Brush Scavenger Hunt
This activity is meant to give a little direction to their aimless wanderings and also help familiarize them with the tools available. Use a list like the Brush Scavenger Hunt list below, or create your own then begin a new canvas.
a brush that looks like paint
a brush that looks like water
a brush that is see through
a bumpy brush
Once they have mastered that list, make it a little more challenging by adding color directives. So with each one add a color. Find a red-orange brush that looks like paint, a light-blue brush that looks like water, a brush that is see through and makes green when you add a layer of blue over a layer of yellow… and so on.
There you have it. Five Procreate activities for kids as young as four. These activities are geared toward helping your little one familiarize themselves with the technology and process of digital art. If you’re interested in helping improve their art skills along with that, click here and check out my online art classes. You can find classes like Little Birders- Drawing Realistic Birds, private 1:1 Procreate lessons, or weekly drawing clubs like Let’s Draw Bugs, Reptiles, and Animals. (Don’t see a time that works for you? Fell free to message me to work out a class for your schedule.)
You can also follow this link to access the first week of my 5 week FLEX class, “How to Draw Realistic Birds (and Think Like and Artist)” for free!
Happy creating!
