How to Draw Realistic Birds- Part Two- Final Drawing
How to Draw Realistic Birds
Welcome back! Don’t forget to sign up to download the How to Draw Realistic Birds- Part Two PDF below.
This post may contain affiliate links. If you use these links to buy something I may earn a commission at no additional cost to you. Thanks.
Part Two- Final Drawing
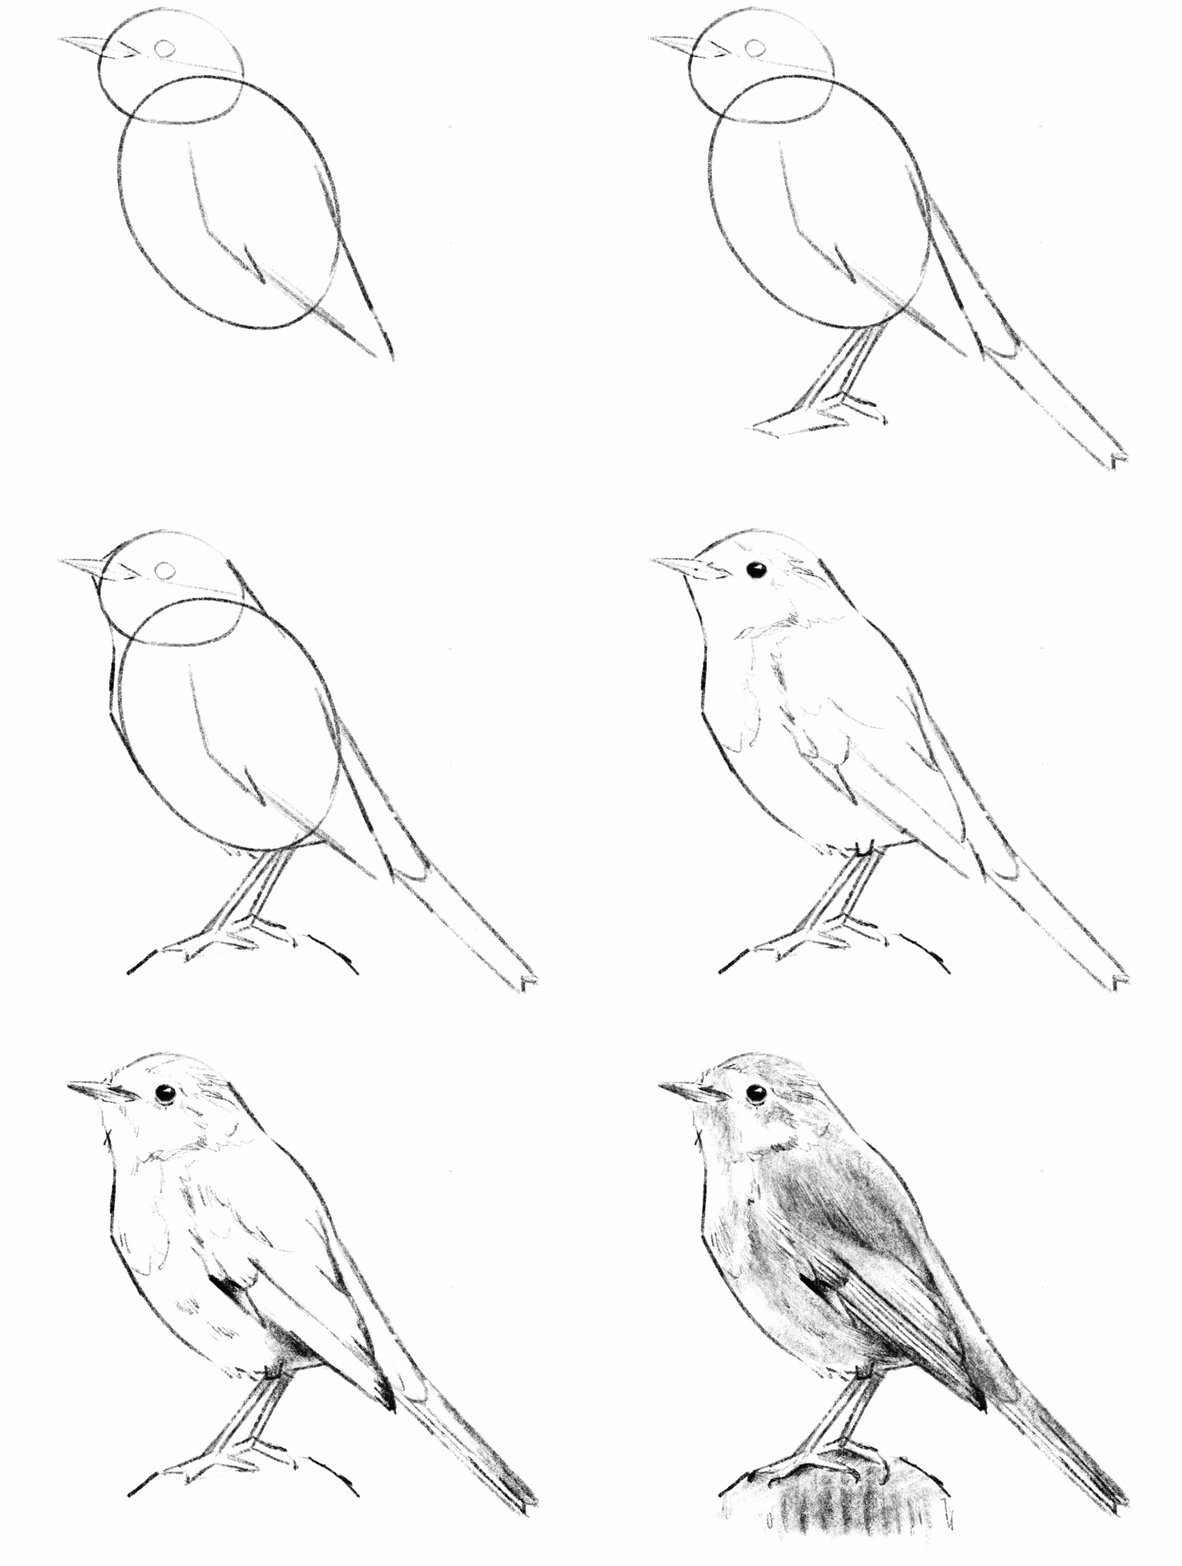
Welcome to the second part of the How to Draw Realistic Birds tutorial. In part one, we learned how to see and use basic shapes to create a sketch that will be the foundation of our drawing. In this post, we will move on to the “artistic” part of our drawing, and let’s be honest— the part we all came for.
Let’s pick up where we left off…
When I talk about the two different stages of a drawing, I will often refer to the sketch stage as the “thinking part” and the drawing stage as, “the artistic part”, because that is essentially what they are. The sketch is the stage of a drawing that forces you to slow down, use your brain as you measure and study and adjust until your drawing is as accurate as possible.
The second stage is the stage of adding shading and details that make it come to life. Before we fully move on, have you adjusted your outline and erased the leftover shapes from our very first few marks? Don’t move on to your shading and details until you’ve checked the shape around the head and neck, checked to see if any of your proportions need adjusting… make any changes that you notice need to be made at this stage. They are harder to adjust later on.
Shading & Details
Shading Practice
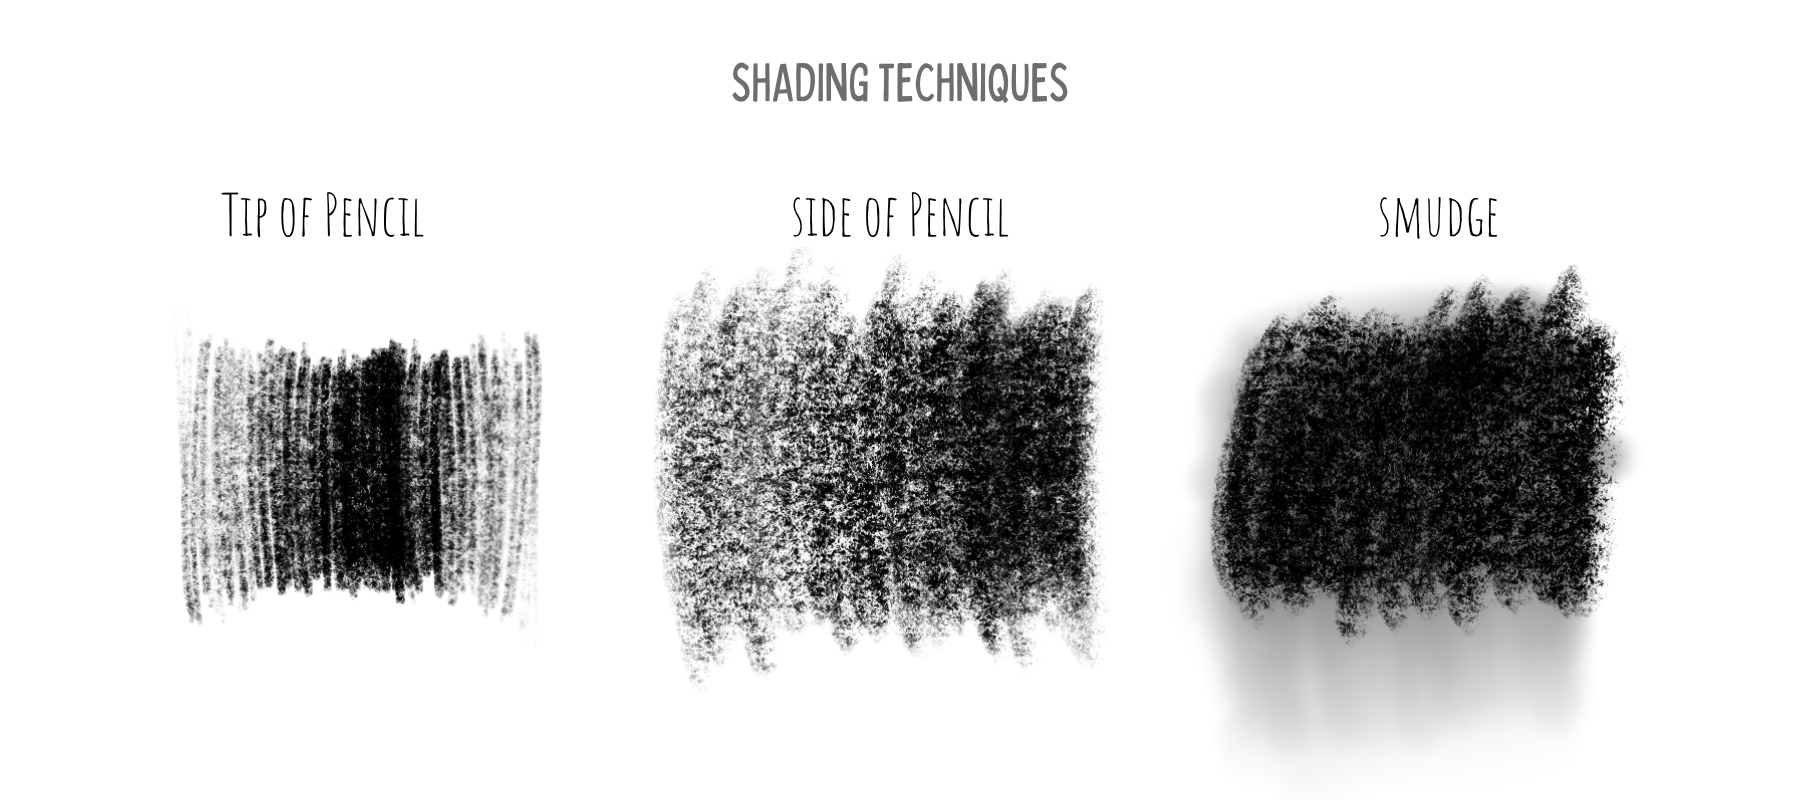
I like to make a few notes about the techniques of shading before we get into the process.
Shading with the tip of your pencil: I’m sure this is obvious, but one method of shading uses the pencil in the same position as when you write, where the tip of the pencil is touching the paper. It may be obvious, but that doesn’t make it easy. Smooth, controlled shading in this way is a skill that has to be developed and practiced. Use this method on a drawing that you plan to spend a lot of time completing (because it is slow), small areas of shading like the eye, and for texture marks.
Shading with the side of your pencil: Another option would be to grip your pencil slightly farther back toward the eraser and apply the graphite with the side of the pencil. Doing so applies the pencil in a softer and faster way. You are still able to create variations of dark and light by pressing harder or going over areas without as much time or delicacy. This is great for drawings which you do not intend to spend a long time completing.
Lastly, and this is somewhat contested among artists, but you can smooth and blend your shading by smudging. I do recommend practicing controlled shading, but it is your drawing. No one cares if you use your finger and soften up those shades. Blend areas of shading by rubbing in circular motions with your finger or tissue. You can even create a smooth gradient by smudging pencil into areas of the drawing that do not have any shading. Use this as a first layer to come back on top with texture or further shading.
Step one: creating contrast
Darkest and lightest areas
There are multiple ways you could go about the next few steps. For the sake of learning, there must be an order, but in your own practice it is more likely that you will find yourself switching between shading and details as it feels right. There is an intuition that you will develop for the process.
Because I believe in some instant gratification as motivation, I recommend starting the shading by finding the very darkest areas of the drawing as well as the lightest. The paper is most likely white and you cannot get whiter than the white of the paper, so in that case we simply leave out the areas of highlight. So those are already taken care of and all you need to do is find the darkest areas.
Squint your eyes at the reference photo. Doing so will take away detail and reveal to you larger shapes of various shades of color. Notice any areas that are so dark when you squint that you can more or less fill them in as dark as possible with your pencil. Some of these areas will not have sharp borders, but they will fade into lighter areas so you will also want to replicate this by fading those darkest areas. Some areas thought may have edges, like the eye.
2. The eye is my favorite place to start because it is quick and very gratifying. To shade in the eye, fill the eye in as dark as possible, but leave out a small organic shape, like a circle, the white of the paper. Even when I don’t see this reflection in the reference photo, I will still add it to the eye. This is because it taps into the way our brain processes shape. As artists, we are putting flat lines and shades onto a paper and attempting to make them look 3-dimensional. This one simple trick will instantly make the drawing look more realistic because the viewer’s brain will recognize it as the highlight that happens on a sphere with a light source. (Step 1. is the last step from the basic sketch.)
3. From here, shade the areas that you have deemed to be the darkest. Because they are areas to shade as densely as you can, you do not have to be quite as deliberate and slow as in areas that require more variation and attention to detail. Immediately, you will see a high contrast in the drawing. By doing this, the form will take shape and it also identifies a value range. By determining the outer limits of our values, it makes it easier to then see the middle values that fall between white and black, or those middle values that will require more deliberate shading (effort).
Step two: suggesting texture
Drawing Feathers
The shading is not complete, but before moving on, let’s take a look at suggesting texture, in this case- feathers.
Often, new artists or young artists will fall into the trap of drawing what they know is there whether they see it or not. A bird is covered in feathers, and most likely, you already know that. So your very intelligent machinery (brain) kicks in and says, “Great. Let’s cover this thing in feathers.” The result will look something like the photo below, and not very realistic. However, by zooming in very closely and tracing what we actually see… you can see clearly that even though there are feathers covering the bird, we do not actually see feathers. What we see are the SHADOWS of the upper layer of feathers being cast on the feathers below. And they often look like hash lines, v or w shapes, squiggles, dots— anything but feathers— but this IS what we see, so this is what you need to draw.
This is called “suggesting” feathers. That is because you are suggesting that they are there without drawing the feather shape. Similarly, you do not need to cover the entire drawing in these lines. You only need to add them to the key areas to suggest the texture. If you struggle to know where to add and where to leave them off, squint again to remove the detail and only add them in some of the areas where you still see the suggestion of them in the reference. You might often see these at the line where the head and body meet, the chest and belly area, and along fluffy edges of the outline.
Step three: Middle values and detail
You are now aware of the skills required to complete your drawing. It is time to go back and forth between these methods and practice your intuition. Look closely at the value in different areas on the body, filling in a smooth value of grey or dark grey in any area of shadow. Use your feather shadow marks to show texture or even to darken areas of shadow. Use light lines for texture in highlight areas and use heavy, dark lines for texture in areas of dark feathers or shadow.
Conclusion
An inspiring artist and naturalist, John Muir Laws, said, “Every drawing is practice for the next.” What he means by this is, if our primary focus each time is on the outcome of our drawing and whether we end with a pretty picture, then sometimes we will succeed but we will likely fail in equal proportion. In the journey toward becoming the artist you would like to be, there will be drawings that you do not enjoy when you are finished. Holding pretty outcomes as your highest aim makes you vulnerable to discouragement, and even vulnerable to giving up. However, if when you sit down to draw you are approaching it as if it is always practice for the next drawing that you do, then regardless of the final product you will have a successful drawing. Each time you intentionally put time and effort into your skill you WILL learn and gain something. You are literally creating new connections in your brain each time you exercise the effort of your skill.
So, more important than all, aim for discovery and get comfortable with the idea of imperfection. That will be your fastest road to art success.
Love all things birds and art?
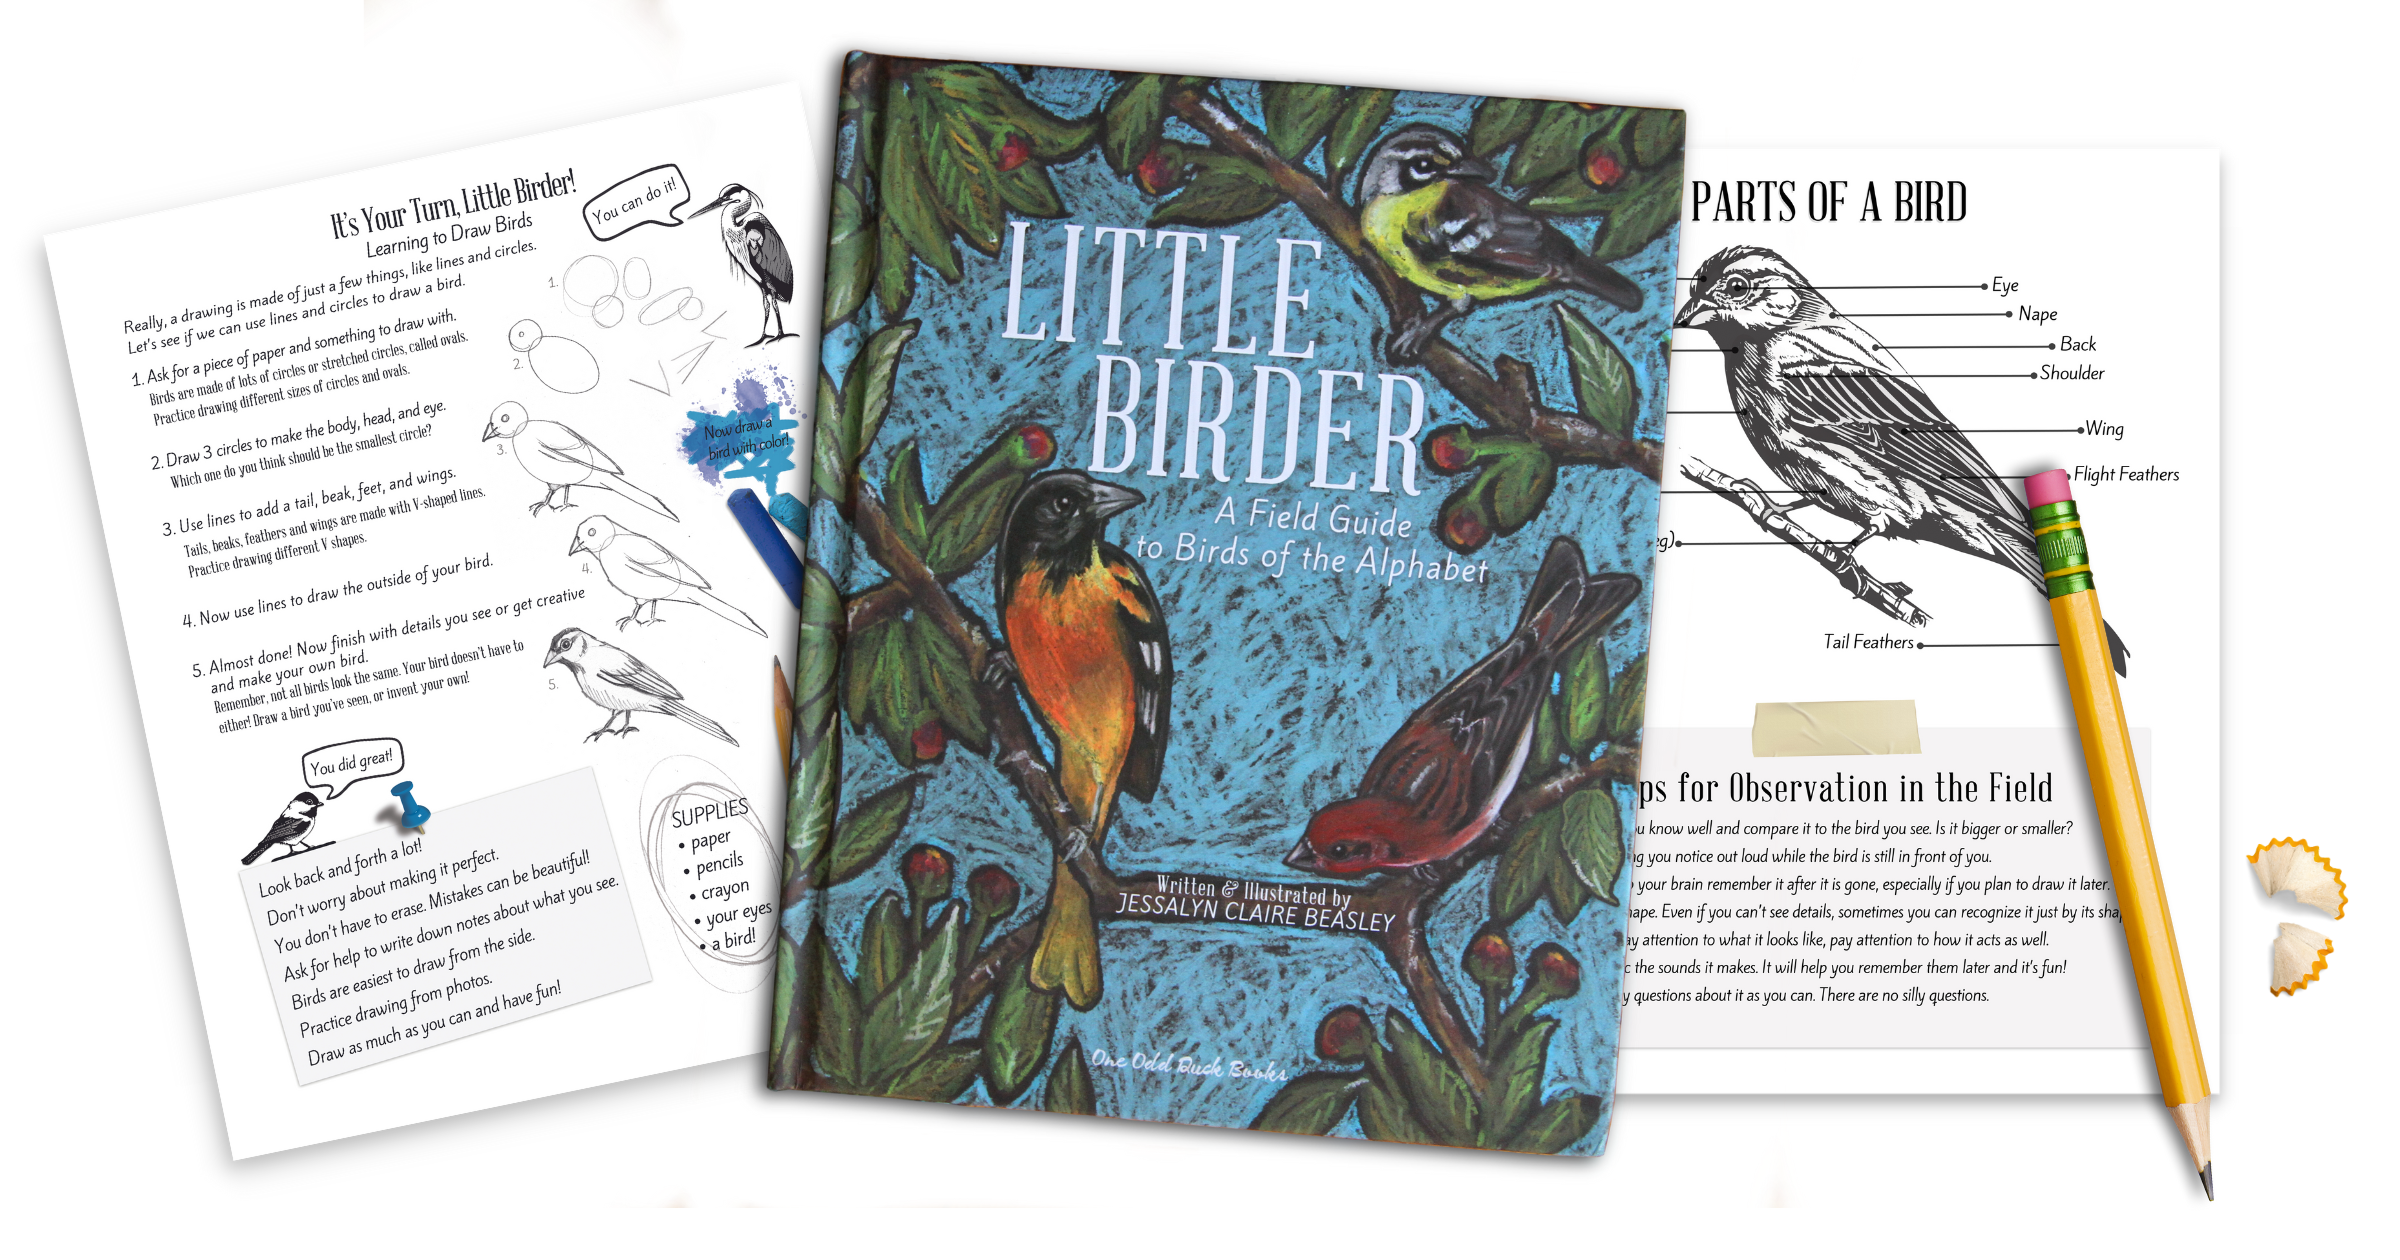
Click the image below to grab a copy of my children’s book, Little Birder: A Field Guide to Birds of the Alphabet.
